TEACH GAME DESIGN IN 5 EASY STEPS!
Want to start making games in your classroom?
Use this ‘Get Started Guide’ to start making games with your students!

STEP #1: WARM-UP
- Pair students and ask them to change 1 thing about tic-tac-toe to create a new game
- Ask students: “How would the rules change?” and “What else would change?”
- Play modified tic-tac-toe games in pairs using the new rules
- Declare: “Now everyone is a game designer!”
STEP #2: SET-UP SCRATCH
- Access free (online) game making platform here: https://scratch.mit.edu/
- Select ‘Join Scratch’ and create a username and password; show students how they can create their own accounts.
- Confirm your account by opening and clicking the email link
- (Optional) Download the Scratch Offline Editor to work on projects without an internet connection.


STEP #3: EXPLORE SCRATCH
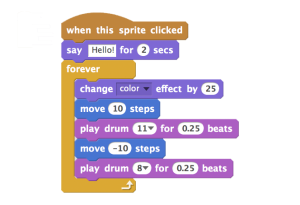
- Demo how to make the “Scratch Cat” on screen move forwards (use “move 10 steps” bloc)
- Explain there are multiple ways to achieve different movements, let students try and explore different solutions
- Explore Scratch in pairs, ask students to: make cat go backwards, disappear, say “meow”
- Show-and-tell features as a group (have students show 1 feature they found in Scratch and what they used it to do)
STEP #4: REMIX A PROJECT
- ‘Remixing’ enables students to modify an existing project on Scratch
- Remix a starter project like the maze or pong game. Or search through published projects on Scratch to get inspired!
- Change one element in the game
- Show-and-tell remixed projects as a group (ask students to identify the feature they changed in the project and how they did it)


STEP #5: PUBLISH & SHARE
- Publish games to Scratch and re-publish remixed projects to Scratch to share with the community!
- This video shows how to share a project on Scratch: vimeo.com/llk/share
- Access all projects (published and unpublished) in your ‘My Stuff’ folder

